Using the same flexibility-first approach, we the Tabs module to be as flexible as possible.
Instead of a "static" tabs module, we built the tab triggers separately and let you decide which content to be displayed under each tab.
This means you can assign any prebuilt module in the theme into the tabs, for example:
Here are the steps:
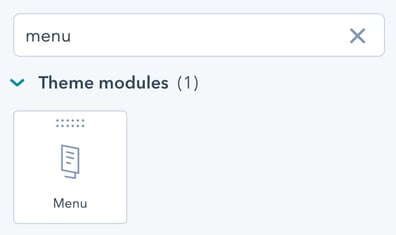
- Find the Menu module in the modules list, and drag-and-drop it into the page.
- Open the Content group inside the Menu module.
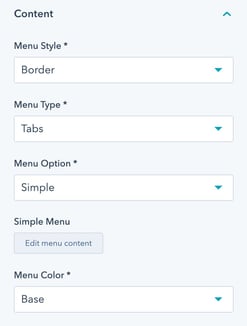
- Menu Style: Choose between Box, Border, Card, or Card with Broder
- Menu Type: Choose to display the module as a normal Menu or function as Tabs.
- Menu Option: Choose between Simple Menu or Advanced Menu
- Simply Menu or Advanced Menu
- Menu Color
- Click Edit menu content. Next is to prepare a unique target for each tab.
In the URL field, you can specify a unique target with the format: #target
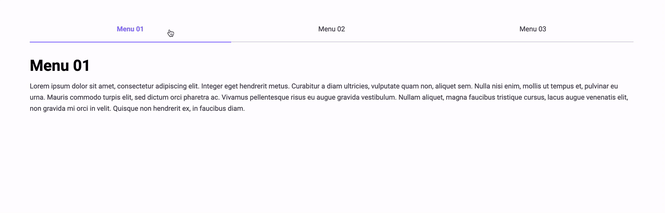
Here is an example: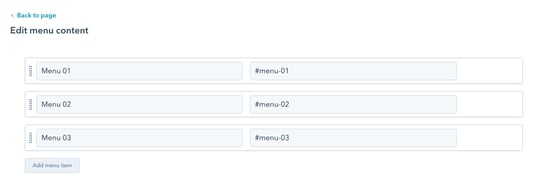
- Once added, it's now time to place the modules that we'll assign to each tab.
Drag-and-drop any module(s) into the same section as the Menu module, here is an example: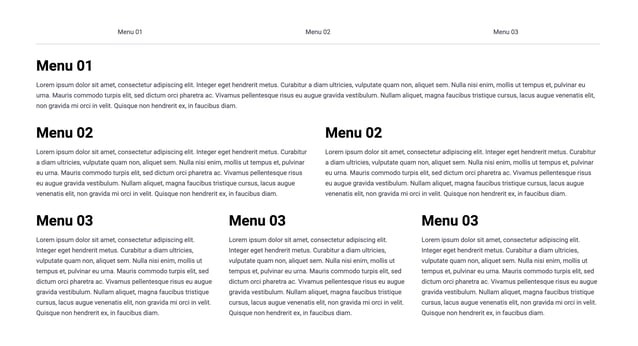
- In each module, assign the unique target (set in step 3) as a class into the Custom Classes field
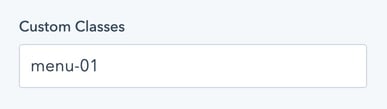
Note: no need to specify the hashtag (#). - Save and done.