
Table of contents
The year 2022 proves to be challenging for organizations. Industries are emerging to a new normal post-pandemic, facing changing customer behavior and stricter competition within the digital sphere.
This new landscape warrants change and more defined growth goals starting with a strong lead nurturing strategy. At the core of this crucial shift is a choice you must make to ensure that your website functions strategically.
That choice involves a difficult crossroads between two equally best platforms: HubSpot CRM and Wordpress.
For starters, you might have been using WordPress for a long time. The platform has served you well.
However, with more brands conducting businesses online, you need more than simply blogging to surface amid the competition. You need a complete inbound marketing strategy that HubSpot can provide.
HubSpot was specially built for marketing, the lifeblood for generating leads. It streamlines your marketing and sales campaigns, covering all bases for the customer journey. Aside from functionalities supporting your content needs, the CRM offers optimization tools, website development, and management.
The last thing we want to have is migrating just for the sake of migrating without knowing what the current challenges are and why HubSpot is a good solution. For this article, I'll dig deeper into the step-by-step process to migrate successfully from WordPress to HubSpot. But first, let's profoundly dissect why you need to take this crucial move.
Let's analyze where the migration will take place: Your website.
1. Review your current website
Before migrating your whole website from WordPress to HubSpot, it's a good idea to assess your existing site fully. I'm not talking about the pages but the overall system that makes you think it's a good idea to move to an entirely new platform.
Reviewing your site is critical to setting up a base or foundation you can look back into once you complete the migration.
Here are the necessary considerations:
Why are you migrating to HubSpot instead of sticking to the current setup?
You might have heard the term SWOT analysis. It's more common to big enterprises but is equally applicable to websites. SWOT stands for Strengths, Weaknesses, Opportunities, and Threats. Identify each for your website so you can better weigh your decision.
SWOT analysis will help you zoom in on a measurable and realistic goal. For the sake of discussion, let's make that goal lead generation.
Determine what works and what doesn't in line with your goal.
With lead generation as your objective, you need functionalities that can grow website traffic and ultimately convert more website visitors into leads. WordPress provides content creation tools, but you need additional plugins for sitemaps, SEO, and web analytics for an in-depth inbound marketing campaign.
On the other hand, HubSpot requires no plugins for the same purposes. Tools are all included in the platform, even mobile optimization. You can attract, engage and delight leads via a single platform.
Identify the impacts of the website's technical issues on your lead generation and bottom line.
Technical issues such as slow page load, site breaches, and recurring page errors like 404 appear superficial, but they are not. These glitches affect your lead nurturing, impacting your conversions and dragging down revenue.
This problem is persistent, especially for websites that aren't optimized for mobile viewing. Slow page load, for instance, always makes your website visitors leave in an instant. According to a 2017 Google study, more than half or 53% of mobile users abandon a page if they wait more than three seconds to see the content they came for. On the other hand, mobile sites with faster page load can earn twice as much as a competitor site that takes more than five seconds to load.
Google recommends aiming for page loads lower than three seconds. Website visitors can only tolerate that amount of waiting time.
A secured website increases trust among web visitors in terms of site breaches. Trust helps deliver more customer traffic and, consequently, more conversions. Moreover, if you don't deal with fraud and hacking, you can focus intently on the more profit-generating business departments.
Weigh the difficulties of maintaining the current website setup.
If you've been using WordPress for a while now, you know when I point out that it's an open-source software package that you need to configure on your servers. You may have used a third-party hosting provider, paying an average of $50 to $1,000 monthly.
You must install plugins for each additional functionality if you need to expand your WordPress site's capacity to host CRMs and inbound marketing tools. If you install at least 24 plugins, you must pay between $267 and $1338.23 per month. That's on top of the average $16.67 to $41.67 monthly fee for security software.
On the other hand, HubSpot is a cloud-based CMS custom-built with marketers' and developers' tools. All 650 plugins available are specially curated to support customer experience for successful lead generation. All this comes free, or you only have to spend about $1,200 a month if you need enterprise-level support. You'll pay less if you're a startup or mid-size company.
Consider the ease of use of the current setup.
The choice between HubSpot and WordPress is unarguably tricky. Of course, you gain a thing or two in one platform, but there's a corresponding loss.
In the case of ease of use, WordPress wins. The platform has banked on its simplicity since day one. Anyone can set up a fully functioning website without even learning coding basics.
In cases where even website development is an alien concept to you, WordPress has been around for so long that many tutorials and hacks are already available online.
On the other hand, you need a team of developers if you plan to migrate to HubSpot and leverage all its capacities. And you don't want random people, for that matter. It would be best if you had experts in HubSpot Markup Language or HubL.
Then again, lead generation and inbound marketing require expertise. So, if these strategies are part of your sustainable growth goals forward, migrating from WordPress to HubSpot is the call you need to make.
If you're up for it, let's dive into the step-by-step process of migrating from WordPress to HubSpot.
Crawl your whole site
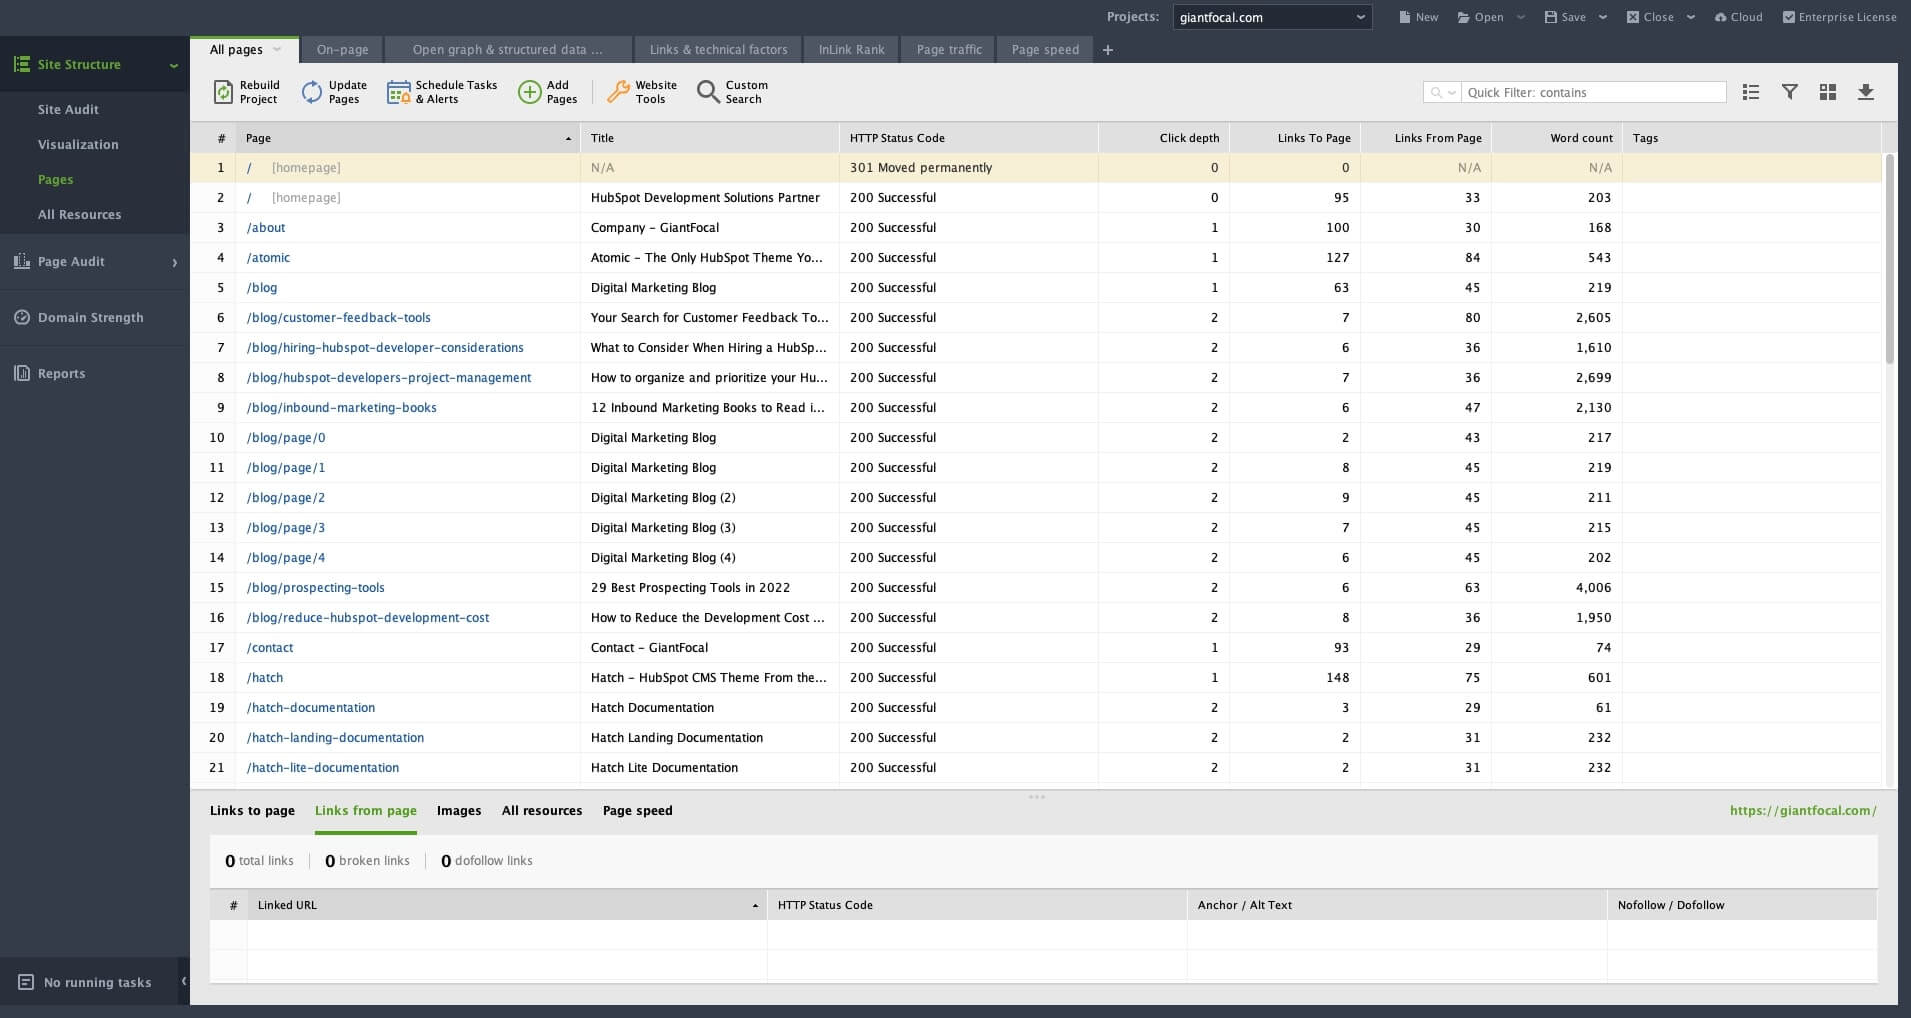
Before deciding which pages to migrate, you should first assemble all pages from your existing site. Crawl the whole website using a site crawler app. Two of the best crawler apps GiantFocal uses are Screaming Frog and Website Auditor.
In most clients' cases, they are surprised as they don't think their site is as small/big as they think. The reason is simple there are always hidden pages that they forget. And the goal is to find all these pages, decide on the pages to migrate and remove the ones you don't need.
Here is a quick step if we're using Website Auditor.
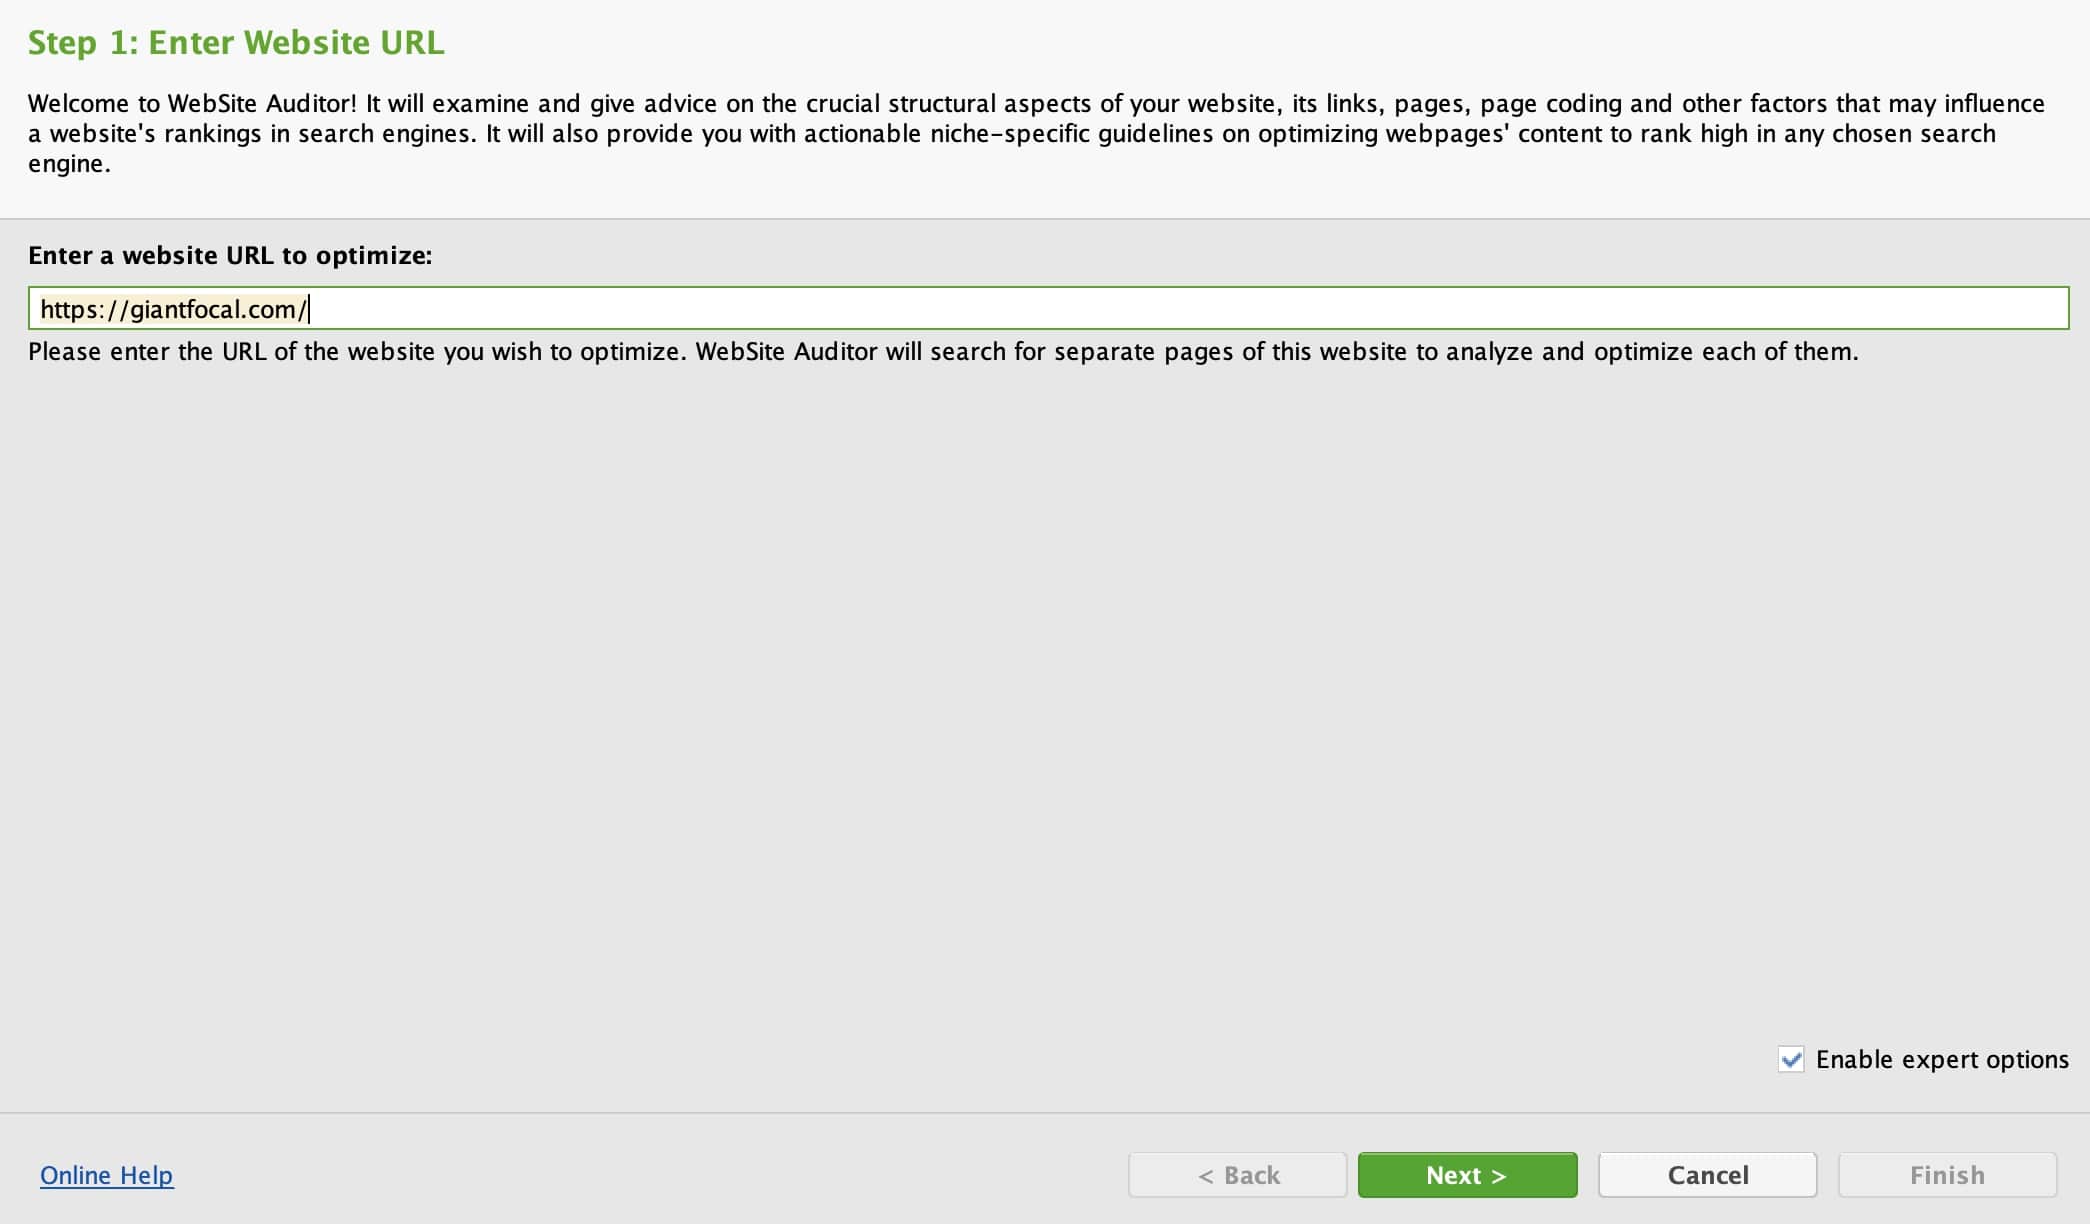
- Suppose you already have Website Auditor installed on your local machine. Choose the option to create a new project.
- Enter your root domain URL, then click Next.
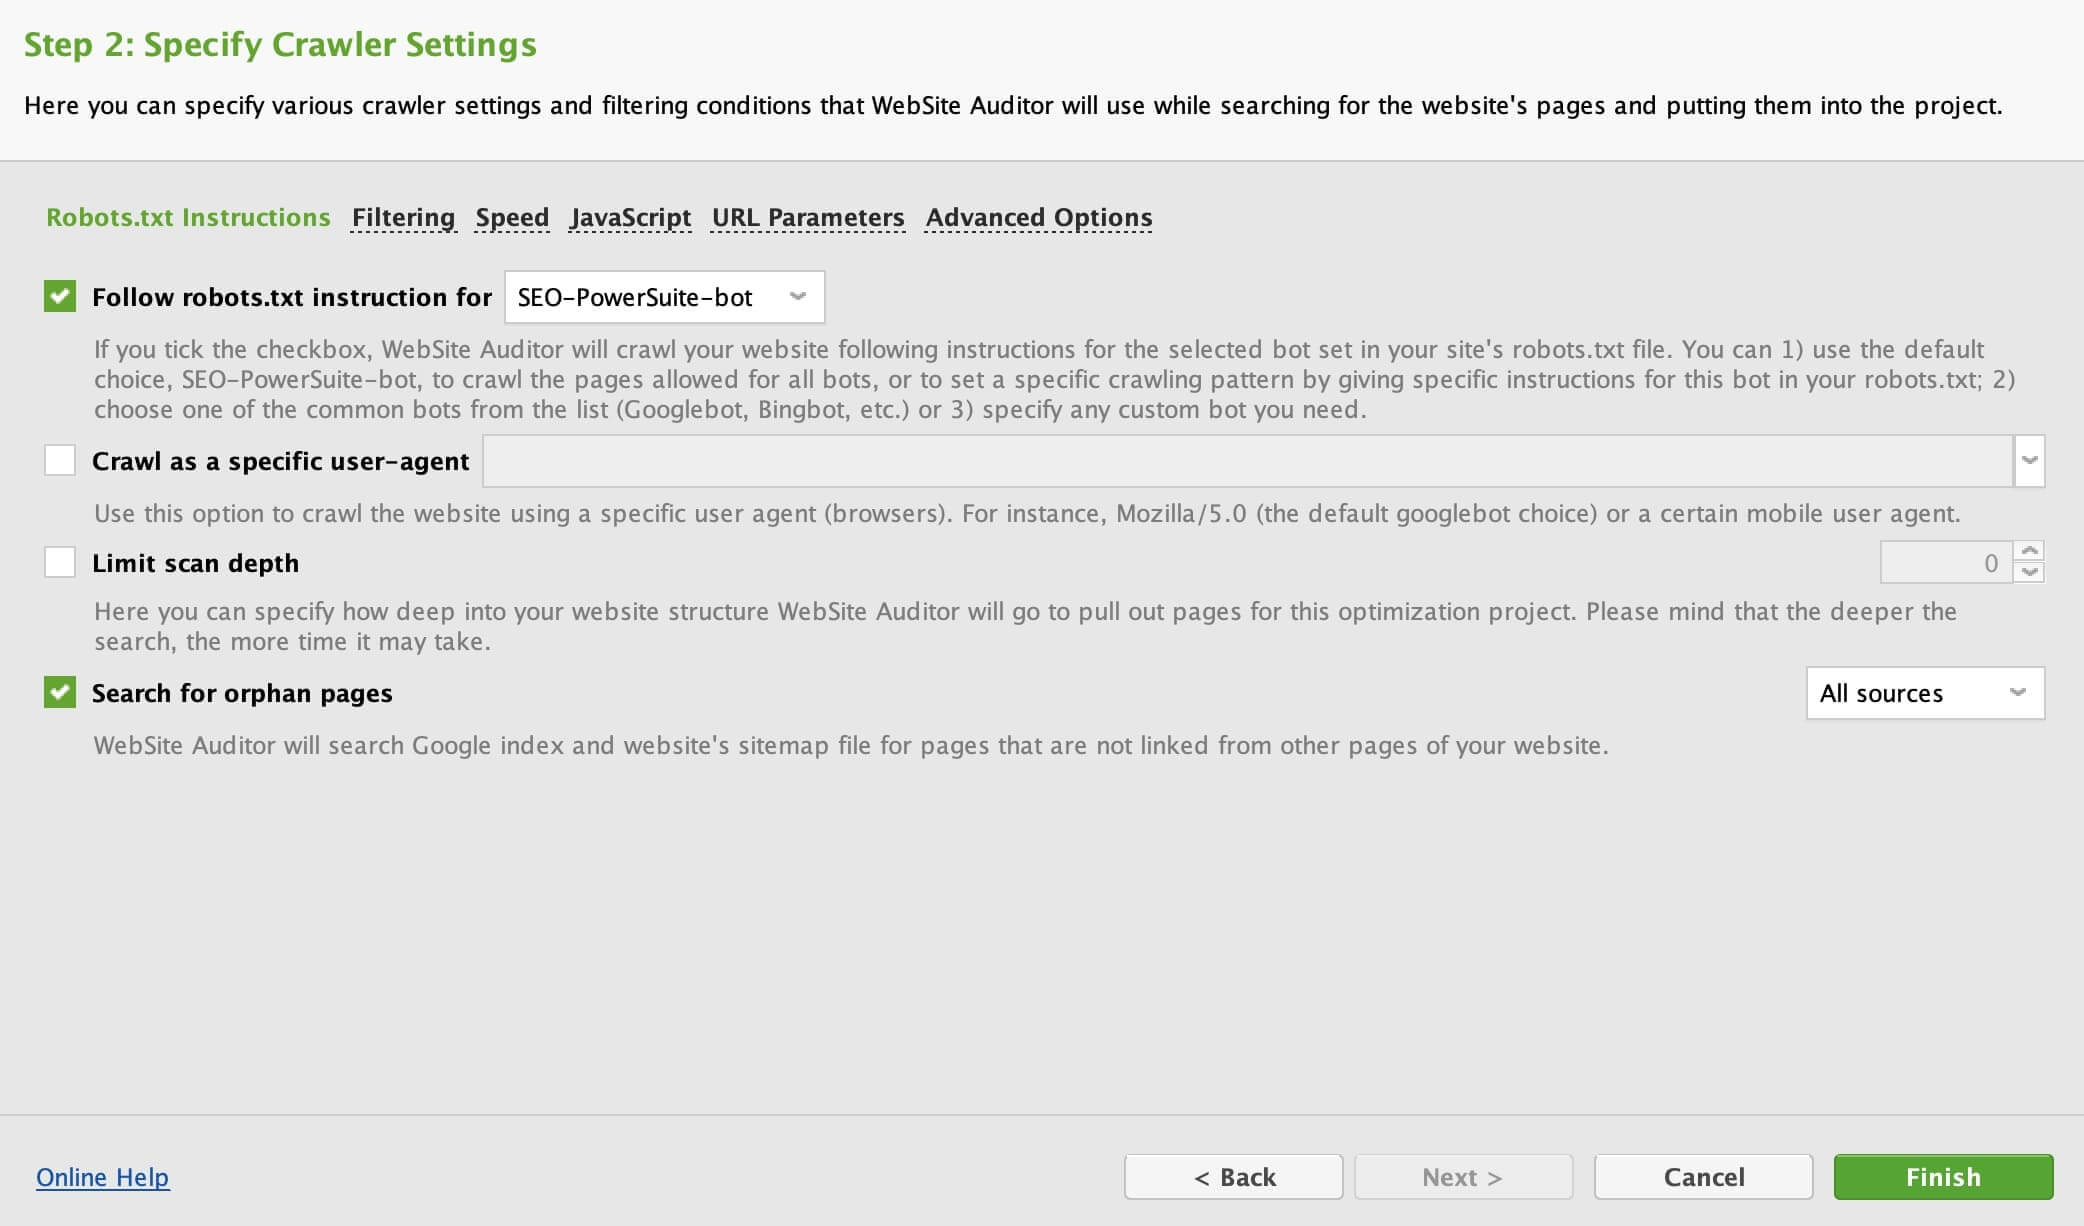
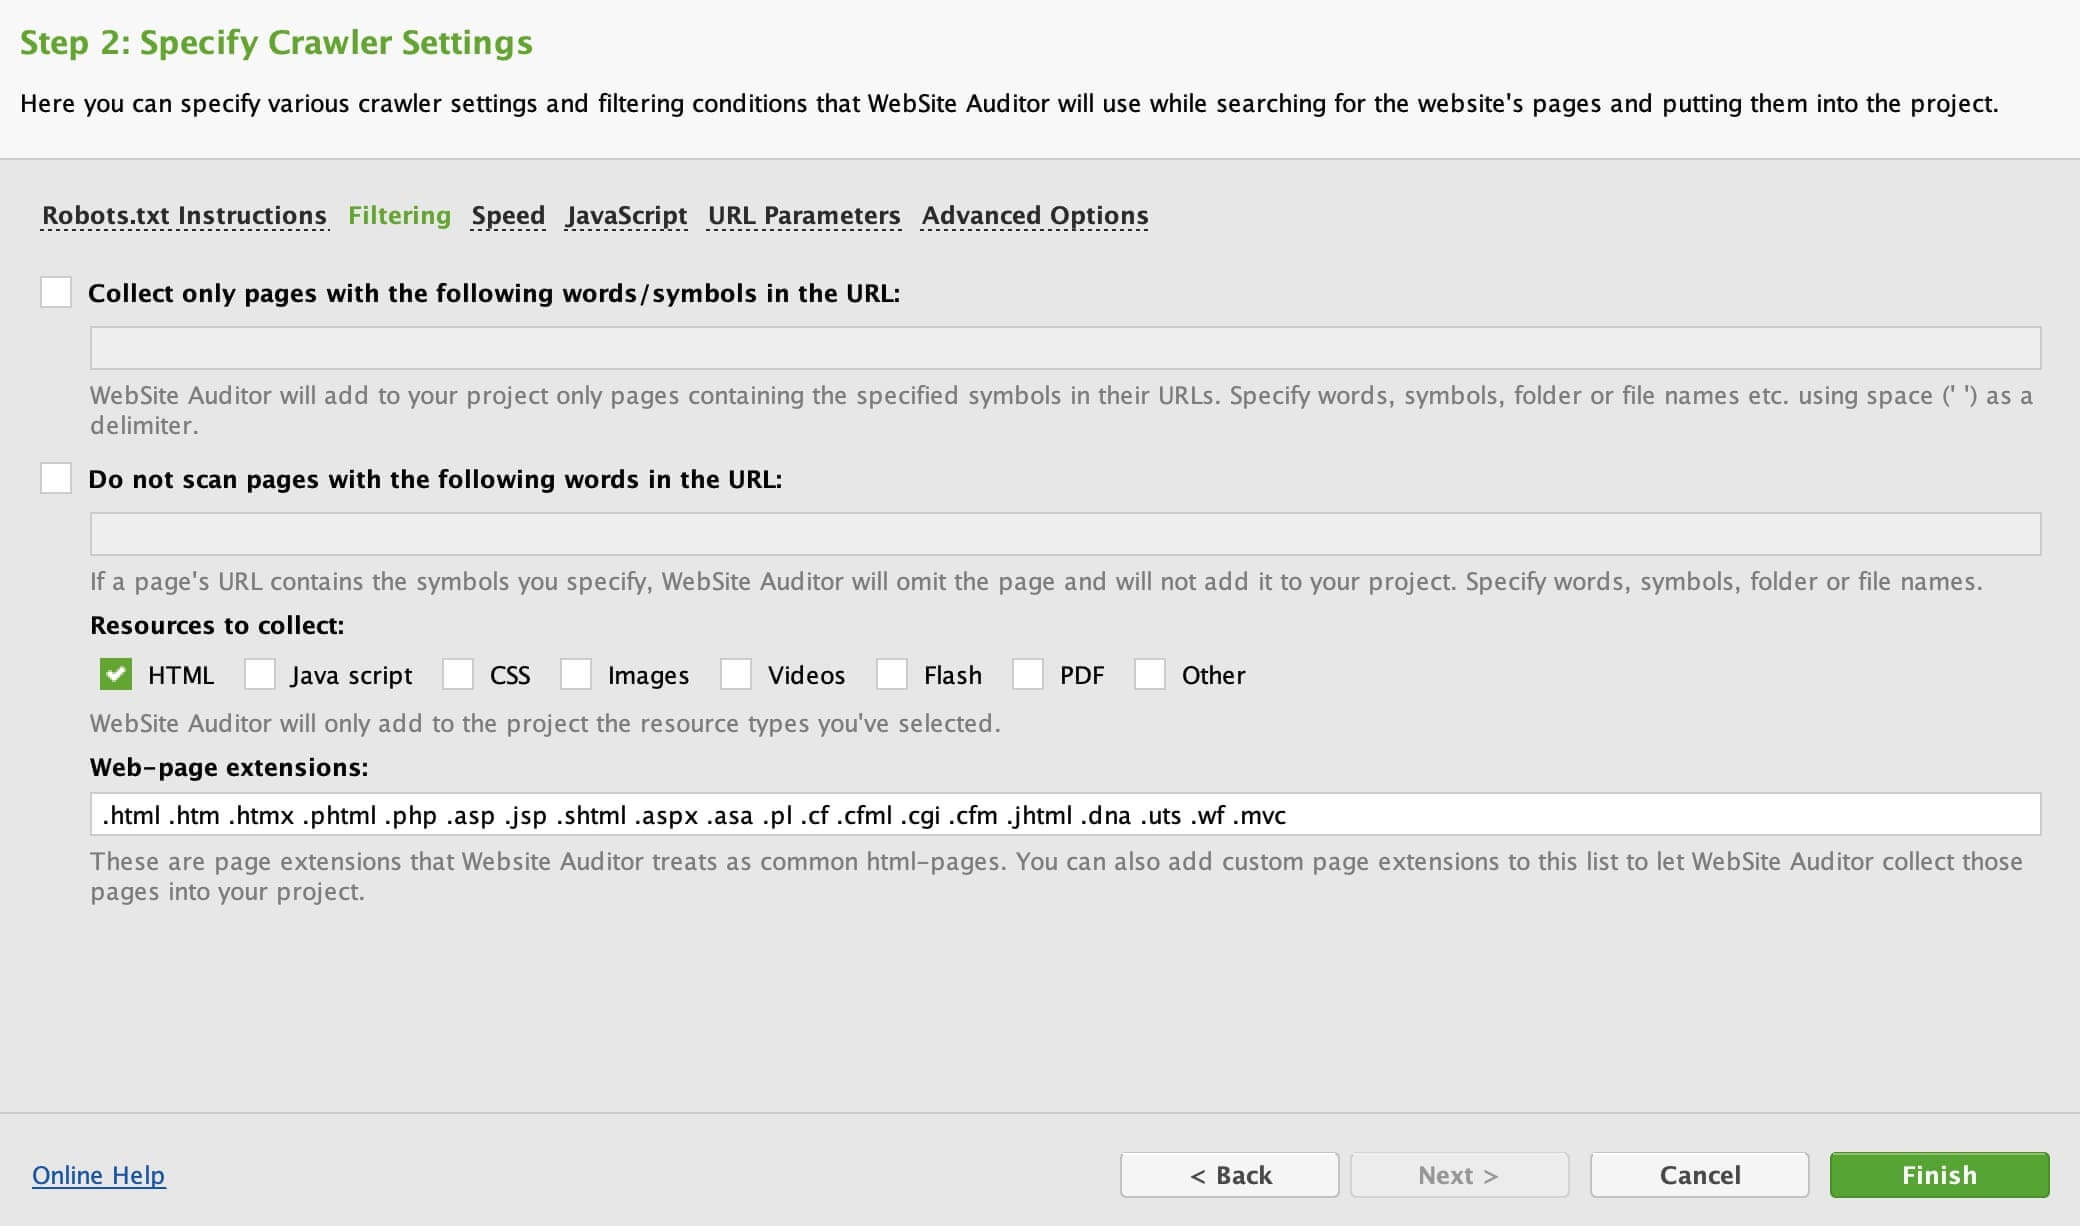
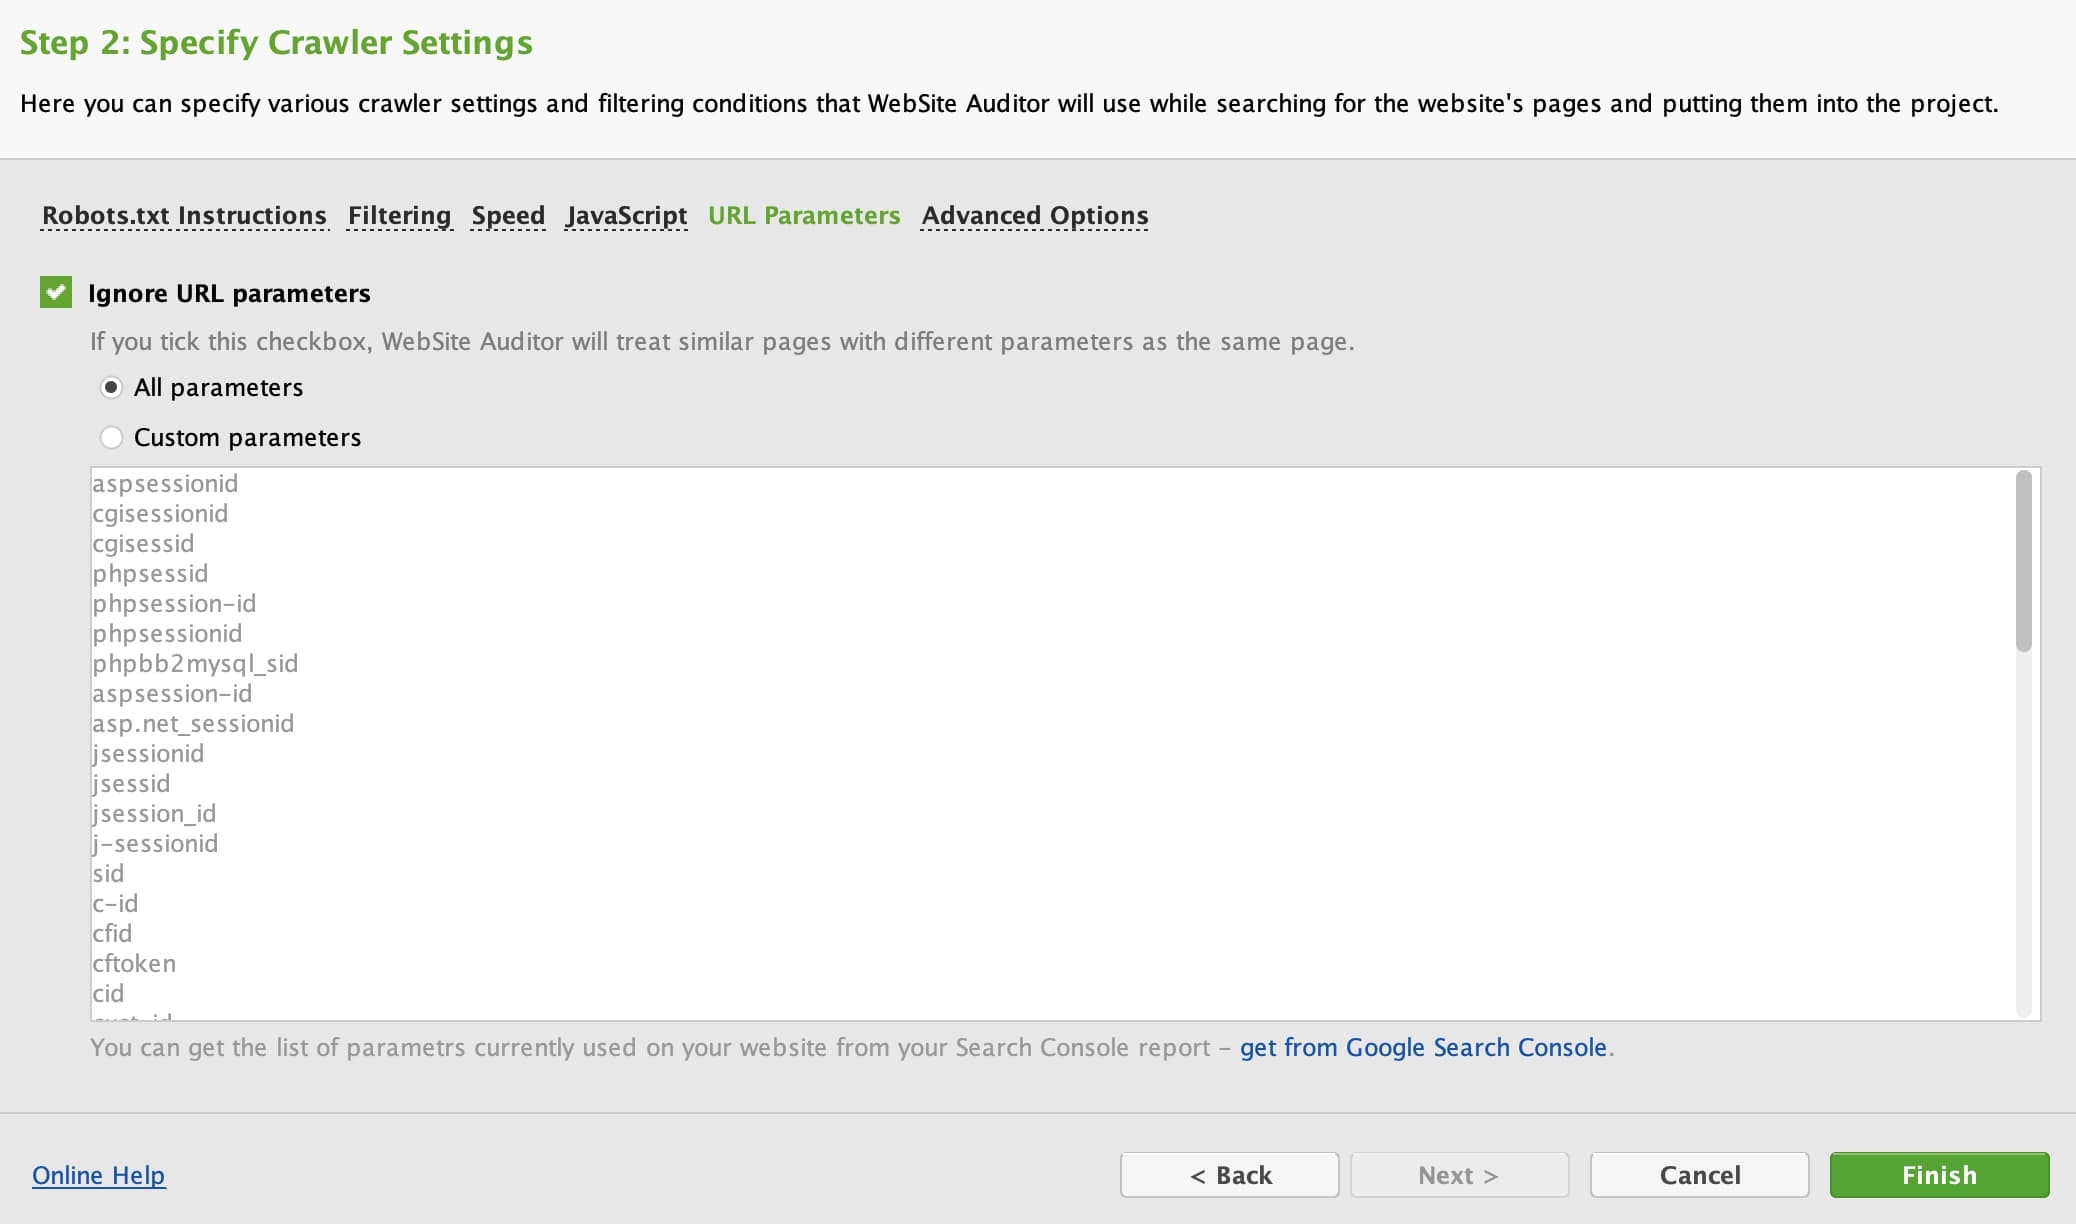
- Choose the following settings:
- Robots.txt Instructions tab:
- Filtering tab:
- URL Parameters. Enable Ignore URL parameters > All parameters
- Robots.txt Instructions tab:
- Once the app finishes crawling the whole site, you'll get the complete list of pages to review.
Create a sitemap of the current site
After crawling your whole site, it's time to generate a sitemap. There are also lots of tools on the market, or if you prefer the good old wireframing tool, that also works.
In this case, you'll need to create two sitemaps: One for the original site (all pages) and the second for the new website on HubSpot.
The second sitemap should only include the pages we'll migrate to the new platform. The rest of the pages shall either be combined or wholly removed.
Web archive every page
Mistakes happen, and the last thing we want is to lose access to a page that we decide not to migrate over to HubSpot. What's the possible workaround if this happens? This point is where Web Archive takes the spin.
If Wikipedia is the source of all information, Web Archive is the go-to source for all web archives (as the name suggests).
Your site, as long as it's accessible to search engines, should be available. But it doesn't mean your most up-to-date contents are there. Web Archive crawls as many pages as you need (unless robot blockers are added to the site's robots.txt).
Be sure to request Web Archive to "archive" your page manually. We always do this step as part of our development project checklist.
Here are the steps:
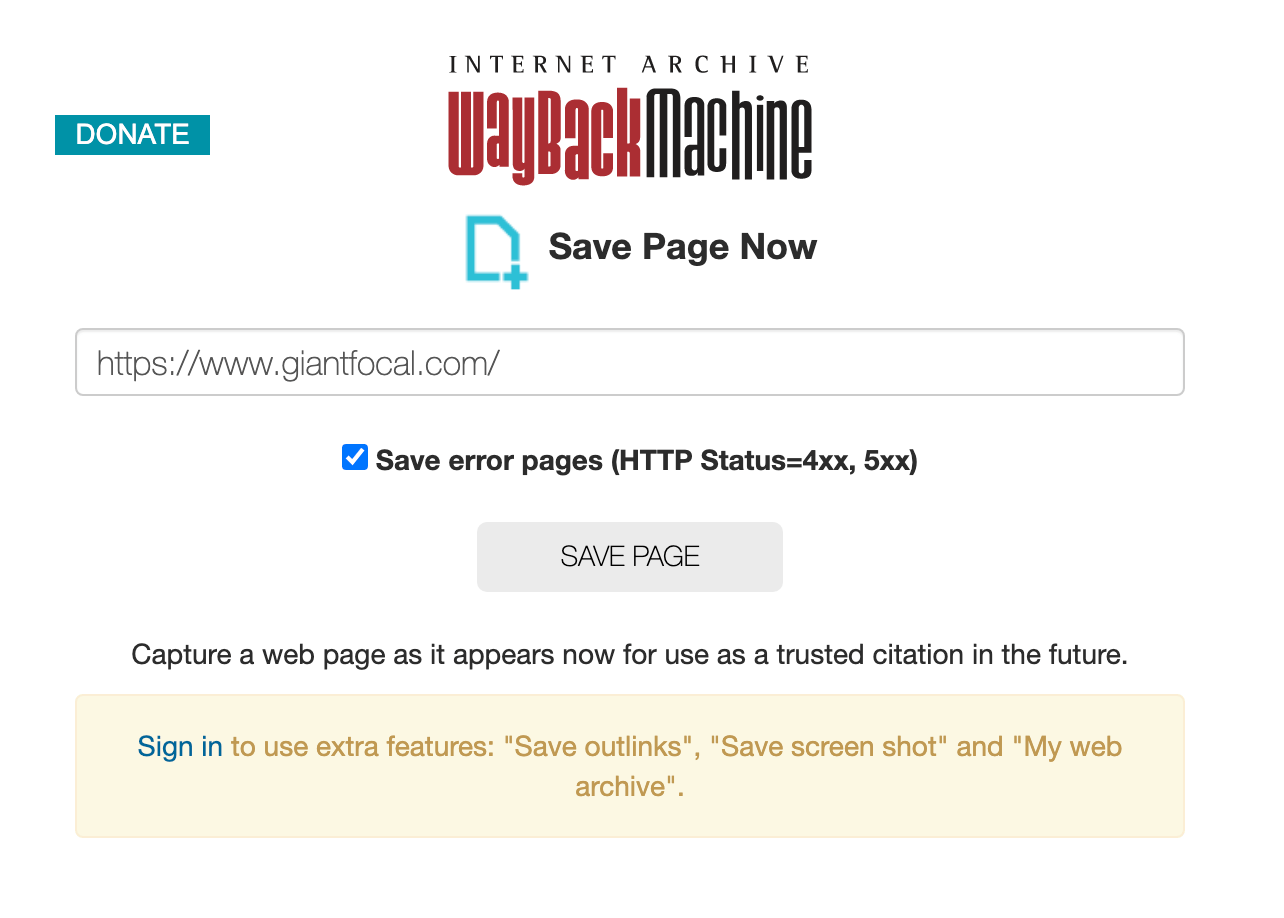
- Open https://web.archive.org/
- Under the Save Page Now, enter your URL
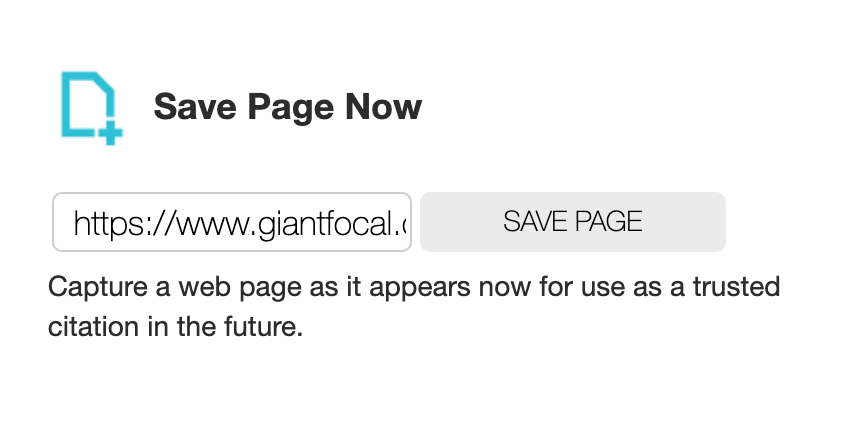
- Click Save Page
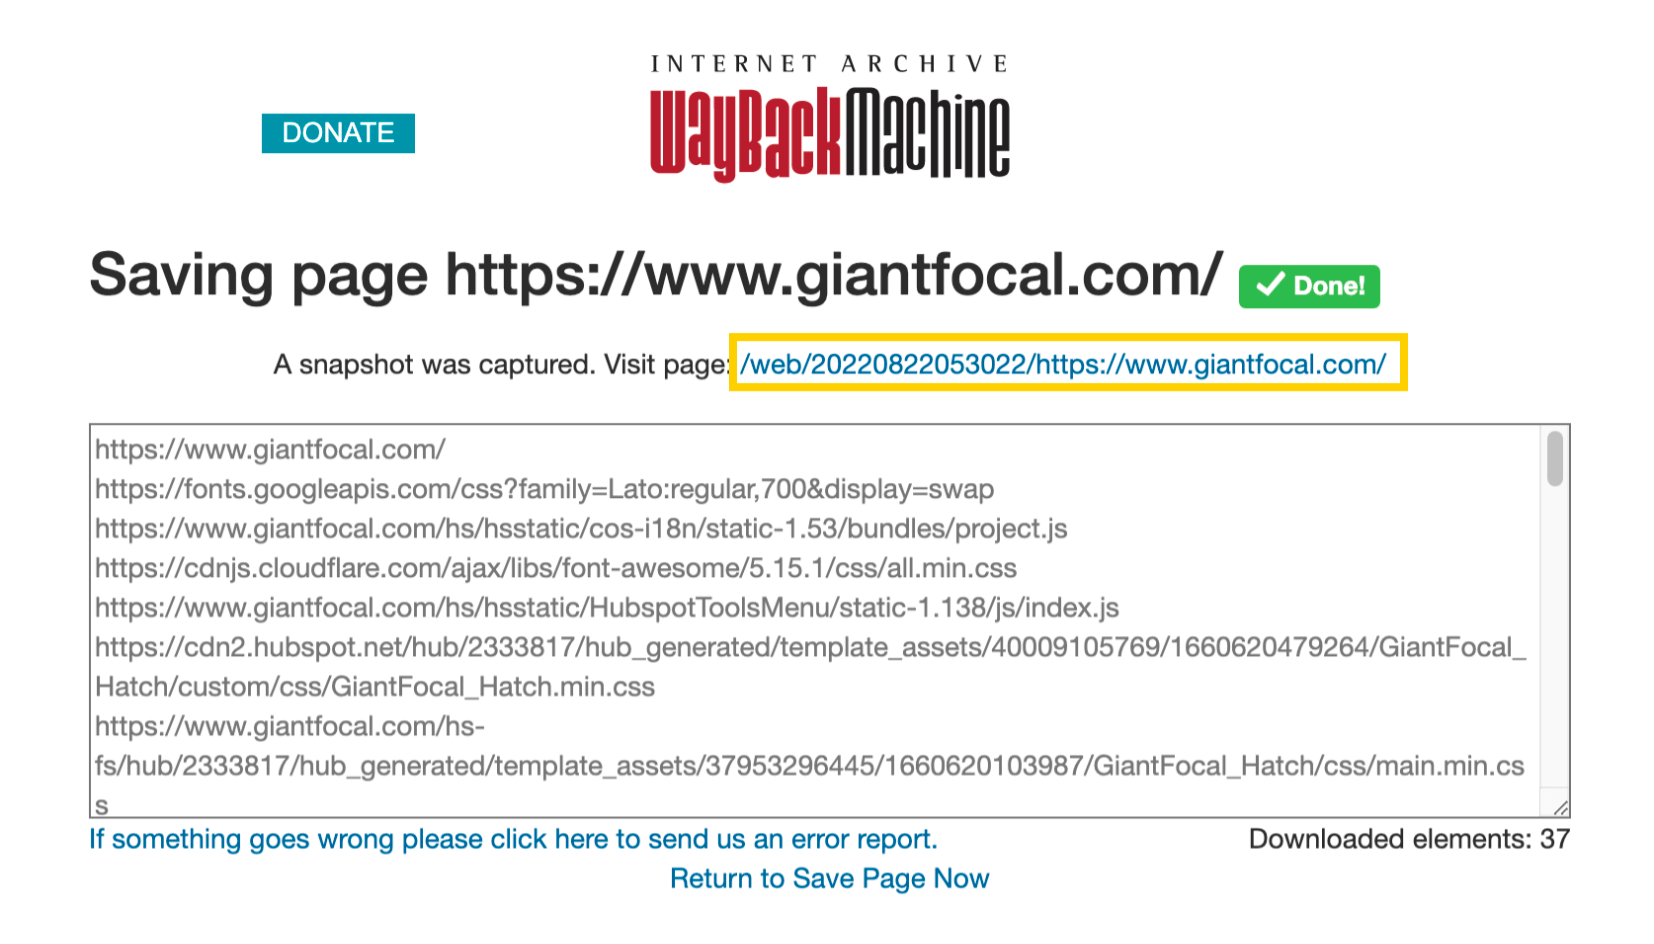
- Wayback Machine will generate a snapshot URL after the archiving process is completed.
Do this for every single page from your current website, no matter if you decide not to migrate it over to HubSpot. Having a backup is always a smart thing.
2. Decide the pages to migrate
After completing all the steps above, you should have two sitemaps: the current site and the new site. Based on the new site sitemap, list all the pages to be included in the migration project.
Combine or remove low-quality pages
Since you're moving your whole site into a brand new platform, you must start with a great foundation to build your long-term success. Google hates low-quality pages. Only keep high-quality pages with proven ranking and solid leads.
A good strategy for low-quality pages without prior rankings or traffic is to combine them into more extensive, meaningful pages or remove them altogether.
Save a snapshot of Google rankings
A migration project aims to generate more traffic, convert leads, and win customers.
Without traffic, no leads, and customers won. So to ensure your migration project turns out to be a success, save a snapshot of your current Google rankings. This way, you have a basis for measurable results that you can replicate for any campaign or initiative you'll have in the future.
Use Google Search Console or third-party ranking trackers such as Ahrefs, MorningScore, SerpWatch, and similar tools.
Once you get the complete list, we'll use this as a benchmark to assess how well the migration project goes.
3. Develop your pages on HubSpot
Now that we have all the pages to migrate, it's time to start the most significant step: developing the pages on HubSpot. Let's first run basic strategies to ensure your portal setup is suitable for long-term growth.
One of the nightmares of a HubSpot customer is a messy portal with unclear folders, files, and a page naming system. And worse of all is to undergo another redesign in 2-3 years. It's like starting all over again when this happens.
Decide on the right pages, files, and folders naming system
Now it's time for the basics: naming system. This step may sound simple, but trust me, it's a big deal.
Without an organized naming system, you're cluttering your portal in no time, even worse if multiple users work in the same portal, each having their system.
Let me be clear: No single system exists for all types of organizations. I'll explain what we use at GiantFocal for all of our customers. If you find it suitable for your organization, that's great. If not, you can fine-tune it or search for another system that works best for you.
Pages
HubSpot pages consist of two types: site and landing pages.
The difference between the two are page goals.
- Site pages, as the name may describe, are the website pages that aim to introduce the company. All site pages are automatically added to the sitemap. Here's how it looks: domain.com/sitemap.xml.
- On the other hand, landing pages have a specific goal of conversion. That's why landing pages have form submission details that you can't find on site pages. Note that landing pages ARE NOT automatically added to the sitemap.
In our company, we added the page type suffix. For example: "Site - Homepage," or "Landing - HubScout."
In many cases, we often create a landing page under the site pages and vice-versa. This naming is especially useful to organize everything in one place.
Files
HubSpot has built-in file storage, similar to a typical website hosting. The difference is HubSpot comes with unlimited storage.
Now that's a great feature, but storing all files without a transparent system can become a nightmare for long-term use.
Here are some files naming best practices:
- Keep file names as short as possible.
- Only use a hyphen or underscores, and avoid other symbols.
- Avoid using spaces. Replace them with hyphens or underscores. For example: instead of "homepage banner.png," it's best to name it "homepage-banner.png."
Folders
This highly depends on the type of projects you do, but here is a simple folders structure we use:
- Project
- Logos
- Images
- PDFs
- Videos
- Fonts
NEVER place a file in the root folder.
Change Template Pack to HubSpot Themes
HubSpot released Themes with its CMS introduction back in 2020. Themes come with a full drag-and-drop page editor, and HubSpot recommends all new customers use themes instead of the older generation template packs.
If you're wondering, template packs are drag-and-drop templates (not pages). They are template-dependent. If you need to customize a page layout, you'll need to edit or clone the template.
Suppose your site still uses the template pack similar to the one above. In that case, we recommend migrating to Theme as soon as possible since you're limiting your access to HubSpot's latest features if you don't migrate immediately.
If you're receiving a proposal with a mention of a "template pack," you should reconfirm your choice of using HubSpot Theme.
Use HubSpot's development domain or Content Staging
DO NOT change your DNS yet. Changing your DNS records is one of the very last steps. If you do now, your current site will be instantly inaccessible, and you'll lose all your rankings.
Saving rankings is why we build out all the pages in HubSpot before moving the domain over for similar projects we successfully handled.
Content Staging is HubSpot's sandbox environment where you can build pages or "stage" a page without messing with the live setting, commonly known as production.
The pages to be developed should be 100% final, meaning they should be production-ready. Because once we connect the DNS to HubSpot, all pages will automatically go live.
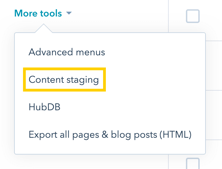
To access the Content Staging, you first open websites or landing pages. Then click More tools > Content staging:
In the Staging panel, you'll find the following three stages:
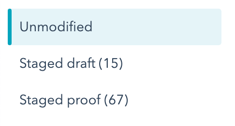
- Unmodified: The list of live pages which you can choose to stage.
- Staged draft: Similar to draft mode in landing/website pages. Staged draft hosts all your draft staged pages.
- Staged proof: Similar to published pages in landing/website pages. Staged proof hosts all your ready-to-go-live pages.
Triple check every page
Before pushing everything live, always complete Quality Assurance (QA) involving these three steps:
Content recheck
Ensure all text, images, videos, forms, and all other elements on the page are 100% ready for production. This collection also includes all third-party integrations such as Google Analytics, Google Tag Manager, Facebook Pixel, and countless others.
Page speed and responsiveness recheck
Page speed is one of the critical factors that affect your Google rankings. Ensure all images, videos, and embeds are compressed and optimized to rank higher.
On the mobile-first pages, responsiveness is the standard. HubSpot is responsive by default, but the contents you add to the page editor may not be. You should remove every page using cross-browser testing apps and responsiveness tools. You can use Cross Browser Testing, Browserstack, and Lambdatest.
Import blog from WordPress
Once all pages are migrated over to HubSpot and are 100% production-ready, it's time to move your blog posts from WordPress to HubSpot.
The excellent news is HubSpot has a built-in blog posts importer.
Here are the steps to export your blog posts from WordPress:
- Open your WordPress's WP Admin.
- Open Tools > Export
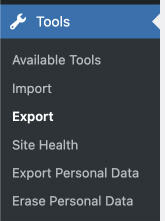
- Select Posts, then click Download Export File.
Then follow the next steps to import your blog posts into HubSpot:
- Open Content Settings
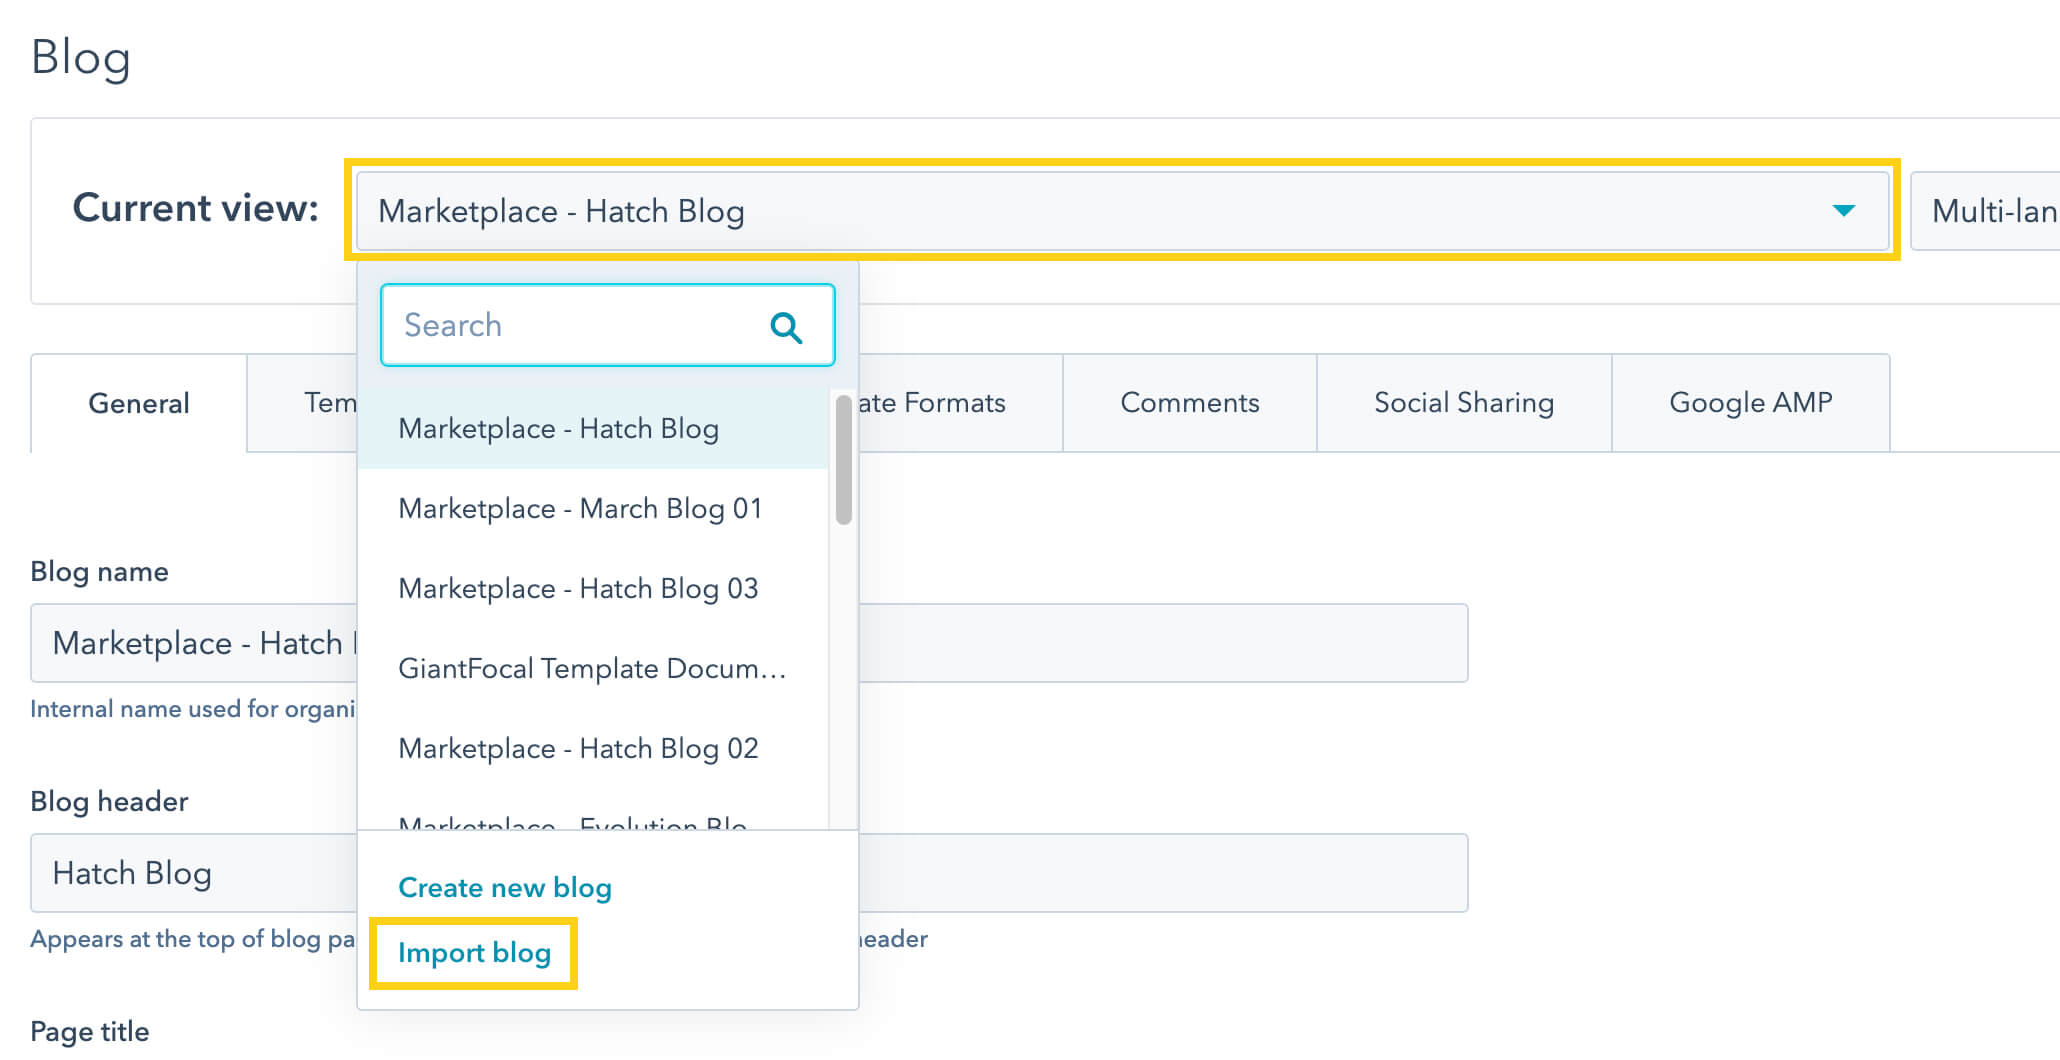
- In the left Sidebar, navigate to Tools > Website > Blog
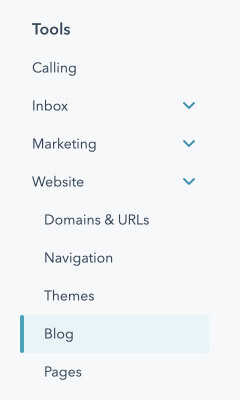
- In the blogs dropdown, choose Import blog.
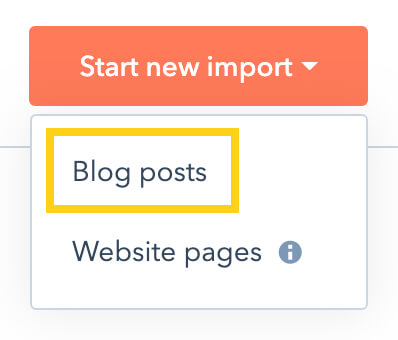
- In the top right of your page, click Start new import > Blog posts.
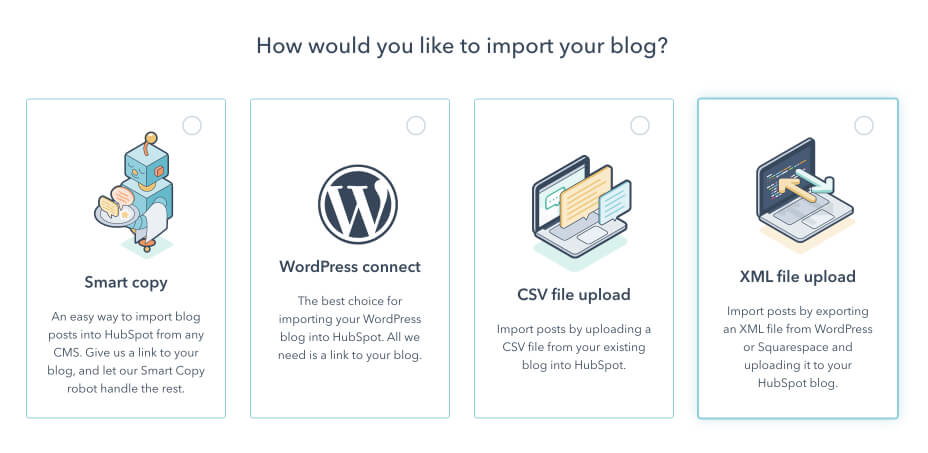
- Select XML file upload.
- Click Import new blog.
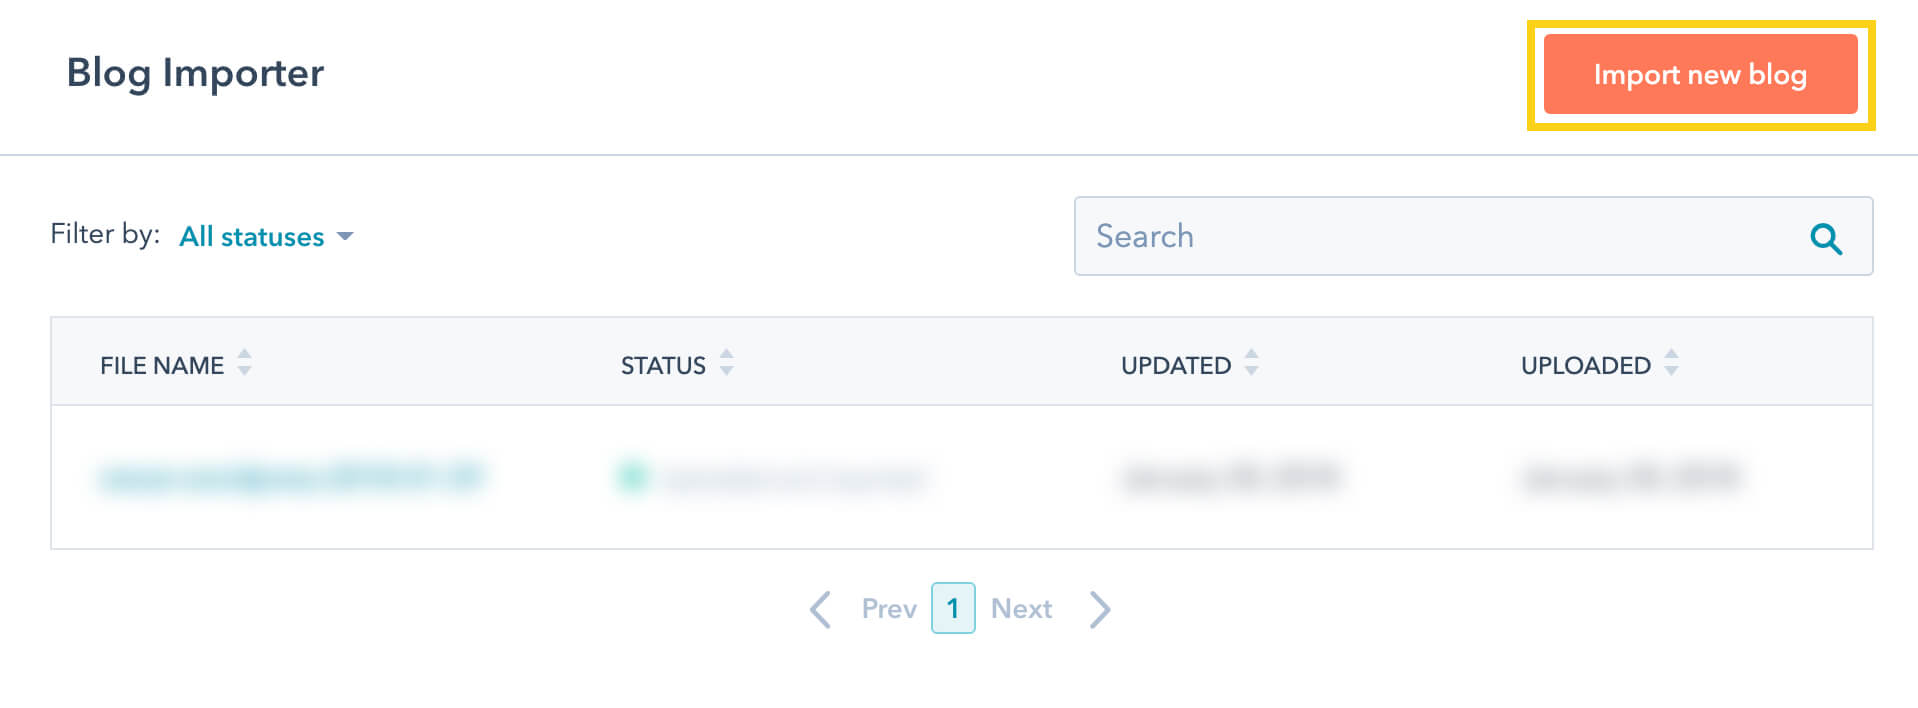
- Then upload the XML file you've exported from your WordPress CMS.
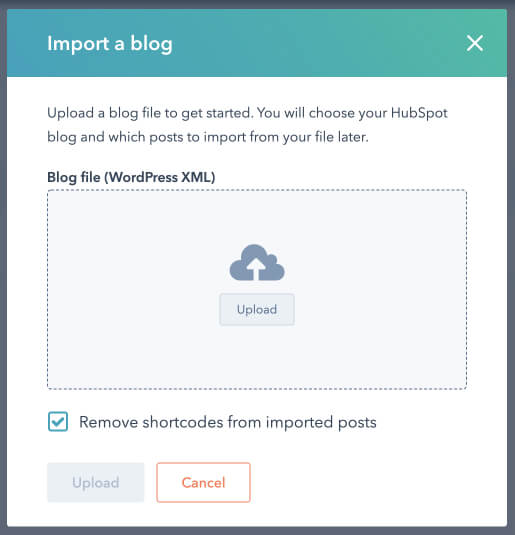
- Follow the next steps.
Set up system pages
Pages, Check! Blog posts, Check!
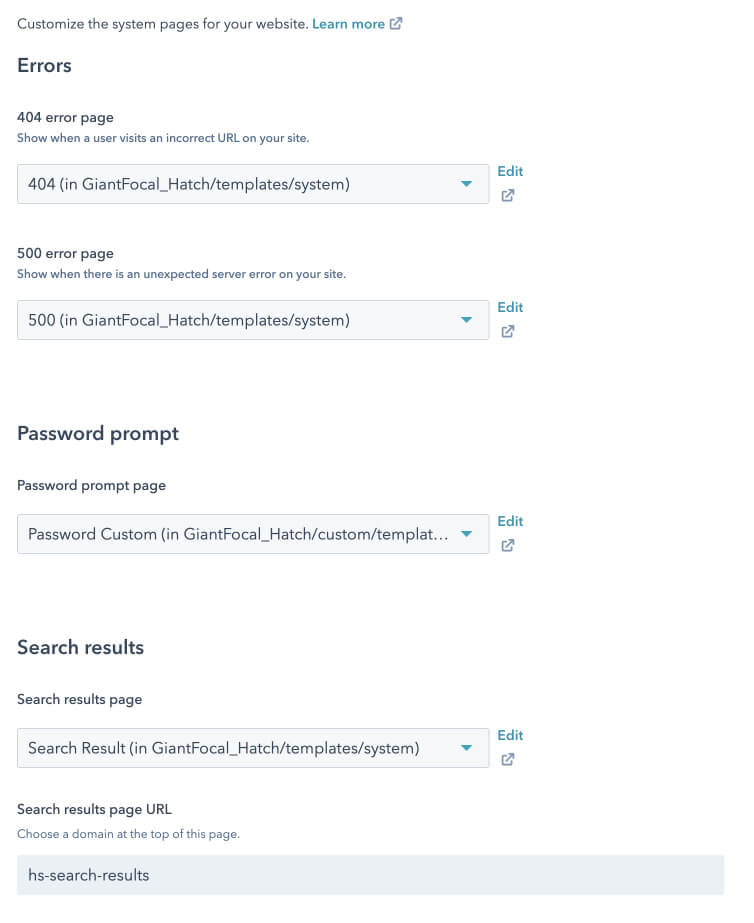
Now it's time for the system pages. I'm referring to 404, 500, search results, subscription preferences, and many others.
If you purchase a theme from the HubSpot marketplace, each purchase should have built-in system page templates. You can assign all these templates from HubSpot's content settings:
- Open Content Settings

- In the Sidebar, scroll to Websites > Pages
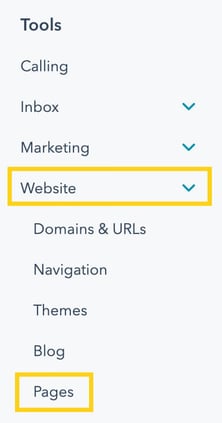
- Click the System Pages tab
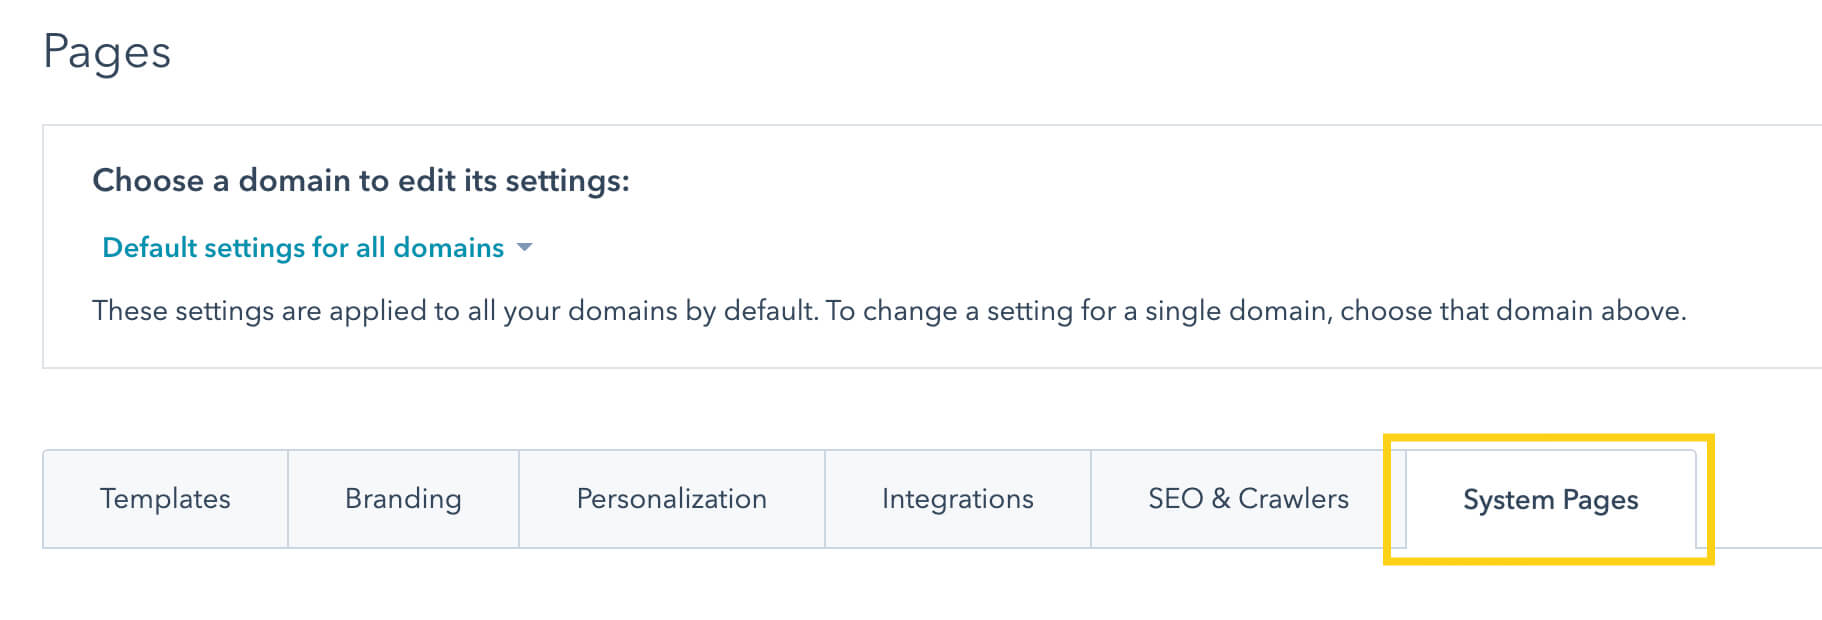
- And select the system templates from each choice option:
If you're building your theme from scratch, you'll need to develop these system pages. A good approach is to copy from HubSpot's default theme and then customize them to adopt your theme's branding and asset files (CSS and JS).
Ensure all workflows and automations are working
HubSpot's workflows and automations are the backbones of a successful HubSpot website. Before hitting that launch button and changing your DNS records pointing to HubSpot, you'll need to ensure every workflow and automation is 100% working.
You'll need to triple-check that they're sending or receiving the correct data if they connect to third-party apps via webhooks or APIs.
Also, ensure all forms connect to the correct automations or email sequences. And don't forget to double-check if the right user receives a notification for every form submission.
All this data is essential, and we sure don't want to lose a single lead or contact that might lead to a sale. Always test, test, and test.
4. Launch
Backup DNS records
Is it time to finally update the DNS records if you completed all pages, blog posts, system pages, and workflows?
Not quite there yet. There is one more step you have to complete: Create DNS records backup.
We may only need to update a line of CNAME DNS records, but it's always an excellent strategy to create a backup of all DNS records. Just in case there was a typo somewhere down the line that affected another DNS record.
Assuming you're using Cloudflare to manage your domain's DNS records, here are the steps to create a backup:
- Log into your Cloudflare account.
- Choose your domain if you host multiple domains in the same Cloudflare account.
- In the left sidebar, choose DNS.
- Cloudflare will then show all of your DNS records. Now click Advanced > Export
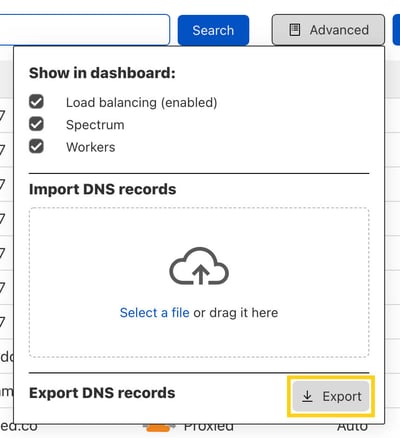
- Cloudflare will export all of your records in a .txt file. You can store this safely in your cloud storage or locally.
Remember: Always create a backup and store it safely.
Update CNAME DNS to point to HubSpot
We're finally here! The final step in launching your new website on HubSpot.
Once all pages are published (in the development domain), blog posts imported, system templates applied correctly, and all automations 100% working and confirmed, you can change your CNAME DNS record.
Depending on the domain registrar, hosting, or website performance application, the steps in changing the CNAME may differ from one app to another.
Assuming you're using Cloudflare as we do for our website (GiantFocal). You can find the CNAME under the DNS settings.
Create 301 redirects
Congratulations! Your website is now officially live.
Suppose there are any pages with updated URLs or removed/combined pages. In that case, you'll need to create a 301 redirection for everyone so that no users or search engines experience a 404 error.
Here are the steps:
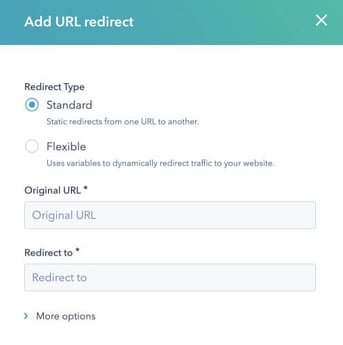
- Open Content Settings
- In the left Sidebar, scroll down to Tools > Website > Domains & URLs
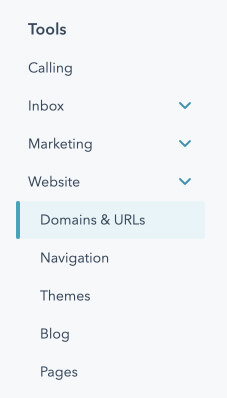
- Open the URL Redirects tab

- Click Add URL redirect

- Create each URL redirection for every URL change from the original site (WordPress CMS).
5. Post-Launch
Stand by until Post-launch
The website launch took place, all is good, isn't it time for a holiday? Not quite there yet.
There are two additional post-launch steps to guarantee migration happens smoothly. This way, you can safeguard your return on investment for this project.
Crawl new site for broken links
What's the biggest enemy of a newly launched site? The broken links.
Not only is it one of the fatal errors that may affect your SEO, but it will also cost you direct lead conversions and sales. Imagine sending hundreds of visitors to a 404 page instead of your conversion page. This mistake will cost you significant revenue loss.
Now, the best step is to crawl your whole new site.
We at GiantFocal use Website Auditor. If you plan to use the same app, you'll need to create a new project as you did in step Crawl your whole site.
Once Website Auditor finishes its crawl and audit, here are the additional steps:
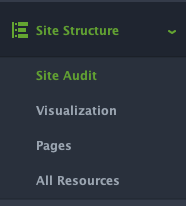
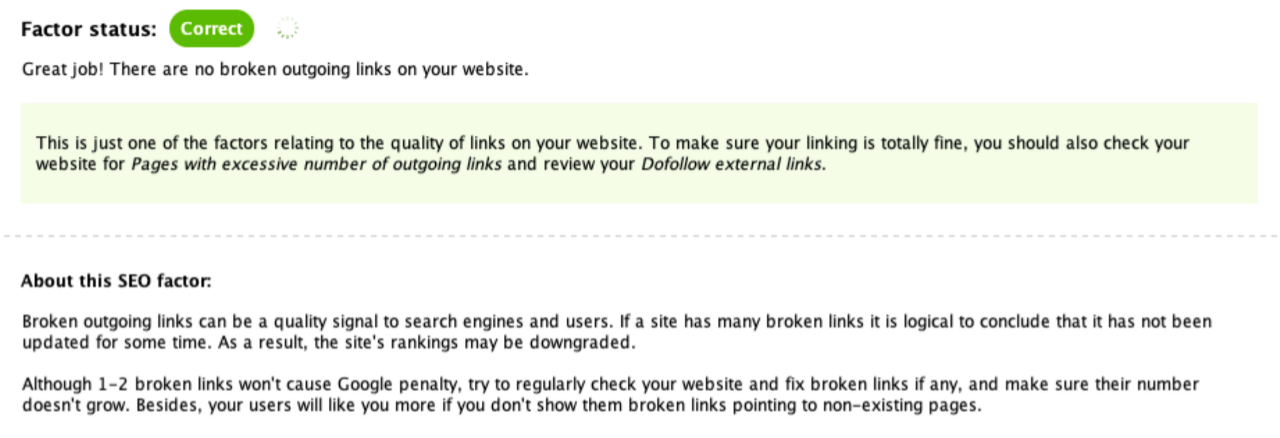
- Open Site Structure > Site Audit
- Scroll down to Links > Broken links

- It should give you a Correct status if no broken link is found
Monitor for Google rank dances
Google rank dances are typical, but they can be a nightmare. After migrating your site, monitor your rankings and see how they perform three months, six months, and one year after your migration.
It would help if you never forgot Google keeps changing rankings in real-time. So you don't need to focus on hourly or daily performance but a long-term horizon.
If a page fell from the top 3, you should review why that's happening. Is there any error on the page? Is the page speed lacking behind all the competitors on the first page, or does the content need a refresh?
This last step is eternal. You have to keep doing this to ascertain a healthy lead generation cycle.
Migration with a dedicated HubSpot web development team
HubSpot is a one-stop solution for successful lead generation. It provides you with all the necessary support to implement a sustainable inbound marketing campaign. Once you migrate, the launch is intuitive, and you can track conversions immediately.
To maximize all opportunities that HubSpot brings, you need experts to support you every step. With a HubSpot web development team, you can focus on things that matter, revenue-wise. Allow GiantFocal to get down to the nitty-gritty of migrating from WordPress to HubSpot.
Get in touch with our team of HubSpot developers today.
Ernesto
Ernesto leads engagement strategy and scopes the Revenue Architecture for incoming clients. With a track record of closing hundreds of international projects, he operates as the senior counterpart for HubSpot APAC's partner team, fronting the work that anchors GiantFocal as Indonesia's #1 HubSpot Solutions Partner.